Saturday, June 25, 2011

Online Stitching Guides

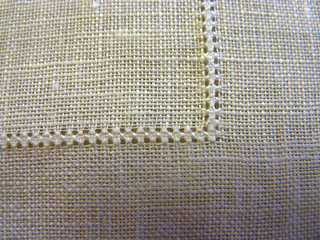
I’ve been working on our group correspondence course, Dresden Garden, and went in search of online stitching guides. No matter how well a diagram is presented, nothing is better than seeing a stitch as it is being created.

The Victoria Sampler site is a great resource. She has a number of interactive, animated stitch guides. Included are a variety of hardanger stitches, pulled work stitches, ribbon work, surface stitches and the hemstitch. Just use the drop down menu to select your animation. She breaks down several of the stitches into parts. You are able to pause and replay all of the videos so you can follow along with each stitch, step by step, at your own pace. While I do like her illustrations, I do disagree with her cutting instructions. She shows cutting the Kloster block by “loading up” your scissors with two threads at a time. I load up all four threads. If you do two at a time your cut will be uneven and the likelihood of having nubs greatly increases.

Another great resource is from Mary Corbet. She has full color videos of a wide variety of needlework stitches. She breaks the stitches down into categories: 1) Line Stitches and Bands, 2) Chain, Fly and Buttonhole, 3) Detached Stitches and Knots, 4) Filling Stitches.  Scroll down to the bottom of the page and you’ll also see how to use a laying tool and create a bullion rose bud.

While you are there check out her Tips and Techniques. She presents step by step instructions on a variety of stitching techniques.

I am making good progress on the baby quilt. I am just about ready for the border quilting. This next week I start swimming lessons with my granddaughter. The lessons last two weeks but I do hope to finish both the baby quilt and the Dresden Garden piece in that time. Photos will be posted soon (I hope!).

Saturday, June 18, 2011

More Stash

This morning our Dresden Garden group met. We are all at various stages in stitching this project so it is good to get together and share hints and tips. We meet again in July and August and then we need to mail our projects to the instructor sometime in September.

On the way home I stopped at a “new” shop in Osseo. Just Relax ‘n Stitch has been open for about a year now. It’s a small shop but the owners go out of their way to help you find what you need. I was there to pick up a large piece of fabric I ordered for a pattern I had purchased in Kansas City back in April. One of the ladies liked the pattern so much that the shop ordered it!

When I was there the last time I had asked if they stocked any Victoria Sampler charts. They did not, but when I was in today they told me they had ordered several and would have them in the shop as soon as they arrived- which may be awhile as the Canadian postal workers are currently on strike.

Upon arriving home I found a package from Nordic Needle. It was my initial shipment for the Hardanger Christmas Ornament Club. You can see from the photo what was included. This first shipment includes all of the fabric, floss, etc., needed for the full year of patterns and came packaged in a nice zippered pouch. In addition to the instructions for the July ornament, they also included a basic guide for Hardanger and a coupon for Dovo scissors. These ornaments are in two parts. You can either layer them for a nice dimensional look or use them as two individual ornaments.


Now, to find more hours in my day so I can get all of these projects finished!

Tuesday, June 14, 2011

Slow and Steady

This was another busy week. Had a great time with our daughter who was here for a long weekend to visit her niece. Even with the trip to The Mall, Como and the train museum I found time to do a little stitching.

Grandbaby number two is due to arrive in just over a month so I’ve been back to work on the baby quilt. I have almost half of the background stitching finished.

I’ve also finished the first lesson for our Dresden Garden group correspondence course. This lesson focused on doing a padded satin stitch in the center of the flowers and a reverse herringbone stitch on the edges of the stems.

You can see the three steps to the satin stitch in the photo. Step one is the outline in a split stitch. Next is a base stitch done inside the outline. Last is the satin stitch done over the first two types of stitches.


The reverse herringbone looks like a backstitch on the top side of the fabric, but underneath the stitches criss cross one another creating a shadow when viewed from the front.


Our group meets this weekend. The next lesson leads us through a variety of filling stitches in the flower petals. More photos when I finish that lesson!

Thursday, June 2, 2011

Tornado, but not much stitching....

It has been almost two weeks since my last post. On May 22 a tornado hit North Minneapolis. Since that day I have been busy volunteering for the Salvation Army Emergency Disaster Services. Many hours logged, so very little time for stitching. I am home again working on scheduling our volunteers for Saturday’s big clean-up. The laundry is done and the fridge is stocked so inbetween phone calls and emails, I am back to my projects.

I’ve been working on two EGA related projects. The first is a new name tag for my guild meetings. I belong to the St. Paul Needleworkers Chapter of the Embroiderers' Guild of America. We are in the Heartland Region and will be hosting the region’s fall meeting this coming October. One of our members designed a logo for the meeting and it has been turned into a stitching chart that we can use as a new name tag. The original logo features the theme of our October meeting, Land of 10,000 Stitches. I left out this part and stitched my name instead. I added a few extra stitches because my name didn’t quite fill in the space.  I used a twisted cord to finish off the edge of the tag. The Euro Cord Maker creates those twisted cords in a snap and is worth every penny, especially if you finish your own pieces.The “lanyard” is a very simple stringing of seed beads.


My second project is a Group Correspondence Course a number of us in the chapter just started. It is a Dresden lace piece called Dresden Garden. It is stitched on a very fine linen, uneven weave, that runs 48-52 count. Yes, you need to actually count those little threads as you stitch. I am part way through the first of three lessons in our book. One of our members, Susan, gave us a helpful hint. We had to draw in the outline of the design after the four sided stitch had been completed. This is somewhat problematic as the fabric moves around as you trace. Susan made a photocopy of the design and basted the linen to that photocopy. This kept the linen secure while tracing the design and was removed after the tracing was completed.


My next task is to get my kits put together for the Hardanger bookmark I am “teaching” at our guild meeting on Tuesday. And, I really should get back to working on the quilt for that soon to be born grandbaby.